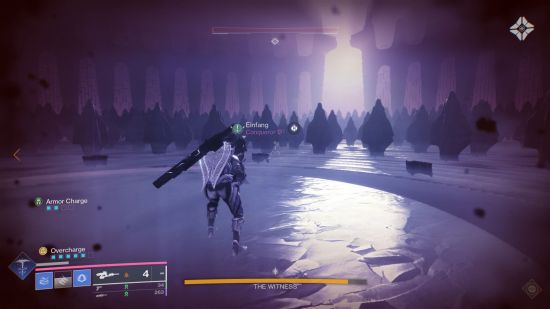
How do you beat Iconoclasm in Destiny 2? This showdown with The Witness is a challenge for any Guardian. As with many of Destiny 2’s boss encounters, there are multiple phases and plenty of mechanics. With this guide, you’ll be well-equipped for it. We’ll go through the phases, plus tips, tricks, and recommendations for weapons and build.
This is your first fight against The Witness in Destiny 2 The Final Shape and it requires you to react quickly, have powerful weapons, and a dash of luck. Regardless of your own skill or if you’re playing normal or Legendary, with a bit of patience you can prevail if you use the new Destiny 2 Prismatic subclass, plus some of its strongest Prismatic builds for your favorite class.
How to beat the Destiny 2 The Final Shape Iconoclasm boss fight
You’re fighting in the original ritual space that created The Witness, and it’s a huge circular arena with plenty of cover and two side rooms. That cover matters – throughout the battle, The Witness will occasionally hurl attacks your way that can easily one-shot you. It also encourages you to use Prismatic, as there’ll sometimes be Bound enemies you’ll need to be Transcendent for – though it isn’t essential to take Prismatic as there’ll be wells around you can charge Transcendence in when required.
This isn’t just any boss fight; as your first confrontation with The Witness, there’s plenty of dungeon and raid-like mechanics to engage with as you battle your way through the three phases of the fight. The Witness is also totally shielded, which you’ll need to wear down.
Iconoclasm boss fight first phase
In all three phases, you’ll be up against packs of weaker enemies (aka adds). First you’re up against Lenurae, Subjugator of Fluxion. Lenurae is an Omen Subjugator, wielding Stasis powers that can slow or freeze, or shatter for nasty damage spikes. It’s helpful here to have something good at add clear, like the new sidearm The Call, along with a Super for a burst of damage like a Hunter’s Golden Gun (especially if you pair it with the Celestial Nighthawk Exotic) or the Titan’s new Void super Twilight Arsenal.
![]()
Once you get Lenurae to half health, they’ll gain an invulnerable shield. Nodes will spawn around the arena, so shoot one of these to open the left side room. You’ll need to run in and grab the relic shield, and once it’s fully charged, alternate fire at Lenurae to remove its shield.
You’ll then hear an audio cue to use the shield to guard yourself, and there’s a fissure of Light to energize your abilities. Stand on the Light fissure in the center of the cover pillars, and guard with the relic to avoid dying to the Witness’s arena-wide attack. Kill Lenurae, then watch for a sword of Light spawning back where the fissure was; with this, you can go to The Witness, and enter the end of the phase. You’ll be teleported to a room of veiled statues, where one Dissenter will urge you to destroy it. Do this and you’ll take down a portion of The Witness’s shield and be sent back out for phase two.
![]()
Iconoclasm boss fight second phase
Phase two of the Iconoclasm fight works in ways similar to the first. This time you’re up against Molak’al, Subjugator of the Traveler. As a Harbinger, they utilize Strand including suspensions – you’ll want to watch out for these, as getting suspended right when The Witness attacks is a one-way ticket to redoing the whole fight. This time, the arena is poisonous, so make sure to keep you (and your fireteam, if grouped) topped up with the Shielded from Darkness buff from the nodes around the arena.
![]()
Along with this, you’ll now also be contending with a number of Bound enemies whose shields are impervious to damage unless you’re Transcendent. Fortunately, the two side rooms now both have Prismatic wellsprings in, in case you’re playing a different subclass. Take care of these, burn Molak’al down to half health, and repeat the relic phase, but bear in mind this time the relic spawns in the right side room. Once he’s down, get your sword and repeat on another veiled statue.

Iconoclasm boss fight third phase
The third phase is the quickest. The Vanguard are all here and they’re fighting against The Witness’s forces with you. All you need to do is pick up the sword that spawns, embrace the Darkness sand smash a third veiled statue. The Witness is vulnerable at last – however, you’ll be cast out of the fight, gravely injured, and need to flee, using the relic guard, moving between recharge fissures, all the way to the end of the walk to escape (barely) with your life. The next events will take place during the Salvation’s Edge raid, so grab your fireteam and head there next.
If you’re struggling to get past the different phases, especially on Legendary difficulty, remember that each of the Subjugators is weak to the type of damage it deals, so use Stasis against the first and Strand against the second.
That’s all eight of the Destiny 2 The Final Shape missions completed, but it’s far from over yet. There’s plenty more to come, including the raid Salvation’s Edge, as well as all the new The Final Shape Exotics to hunt down, lost Ghosts to find or get your hands on the remaining Prismatic fragments you didn’t unlock during the campaign.
